KVR MARKETPLACE FAQ
Log into your KVR member account and navigate to your KVR Developer Dashboard.
When logged in, this link will take you to your Developer Dashboard directly: https://www.kvraudio.com/z
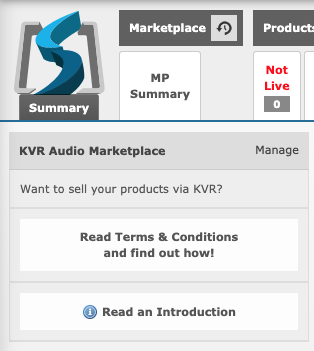
The first tab group on your Developer Dashboard is labeled Marketplace.
This group contains ONE tab labeled MP Summary.
Click this MP Summary tab to reveal the KVR Marketplace Terms and Conditions Agreement. Read it carefully and thoroughly. Then, if you are in agreement with these Terms & Conditions…
Check the box at the bottom
Click the APPLY TO SELL @ KVR button to submit.
This application will be reviewed by a human. Please allow a day or two for that to happen. When your application is approved you’ll receive a confirmation email.
If anything seems amiss you’re welcome to reach out to us directly at Marketplace@KVRAudio.com.
When your application is approved you’ll be able to undertake the process of activating your individual products so they are available for us to sell within the KVR Marketplace. Additional tabs will then appear in the Marketplace Tabs Group. These will allow you to onboard and manage your Marketplace products.
To authorize your products already onboarded to the KVR Product Database so they may be Sold Via KVR (SVK) we require four critical elements:
- INVENTORY
- INSTALLERS
- DELIVERY INSTRUCTIONS
- SUPPORT CONTACT INFO
Unless your product is unprotected.
For step by step procedures visit this FAQ:
How do I upload license code inventory to be sold via KVR Marketplace DIRECT?
This URL is masked such that customers can’t detect the source location of your file.
Step by Step instructions for making Installers available are here:
How do I make small installers available so they may be sold via KVR Marketplace DIRECT?
How do I make large installers available so they may be sold via KVR Marketplace DIRECT?
Step by Step instructions are here:
How do I create a Delivery Instructions document for KVR Marketplace DIRECT?
Step by Step instructions are here:
How do I add my Tech Support Contact Info to my KVR Developer Account?
When you’ve handled these four elements you’ll then need to connect these elements with each product.
This final step is explained in our FAQ entitled:
How do I activate my product so they may be sold via KVR Marketplace DIRECT?
DIRECT SELLERS: How do I upload license code inventory so it may be sold via KVR Marketplace DIRECT?
To upload license code inventory for your product so it can be sold via KVR Marketplace DIRECT…
Log into your Developer Dashboard: https://www.kvraudio.com/z.
To access your Developer Dashboard you must first be logged into KVR with a KVR Member identity authorized as an ADMIN or EDITOR for your brand.
The first tab group in your Developer Dashboard is labeled Marketplace.
Within the Marketplace tab group look for the tab labeled: Config & Contact.

Click the Config & Contact tab to display the Config & Contact edit page.
Here you can do three things:
- Create License Silos to store your license code inventory.
- Upload inventory to your License Silos.
- Create Delivery Instructions for your products.
To create a license silo look for the ADD NEW button in the left column.
To add a new License Code Silo click the ADD NEW button to display the License Silo EDIT dialog.
Name your new license silo to match your product name.
Click SAVE to save your new License Code Silo.
Close the edit dialog to return to the Config & Contact page.
Refresh the Config & Contact page to display your newly added License Silo.
A new (empty) license silo will look approximately like this:

Of course, your Developer Name and Product Name will appear instead of (KVR Marketplace) $100 Gift Certificate. The zeros tell you there are Zero license in this silo, Zero have been sold and Zero remain. The last “Allocated to 0” tells you that this license silo is not allocated to any product in the KVR Product Database.
To upload license codes, click on your new (empty) license silo to display the License Silo Edit dialog again.
Look for the ADD LICENSES button.
Click the ADD LICENSES BUTTON to display the UPLOAD dialog. 
You CAN upload a single code but usually you’ll upload multiple.
To upload multiple License Codes:
Arrange your codes on a PLAIN TEXT document so they are one code per line.
Click CHOOSE FILE to select your PLAIN TEXT license codes document.
Then click SAVE to upload.
If you are successful the upload dialog should look like this:
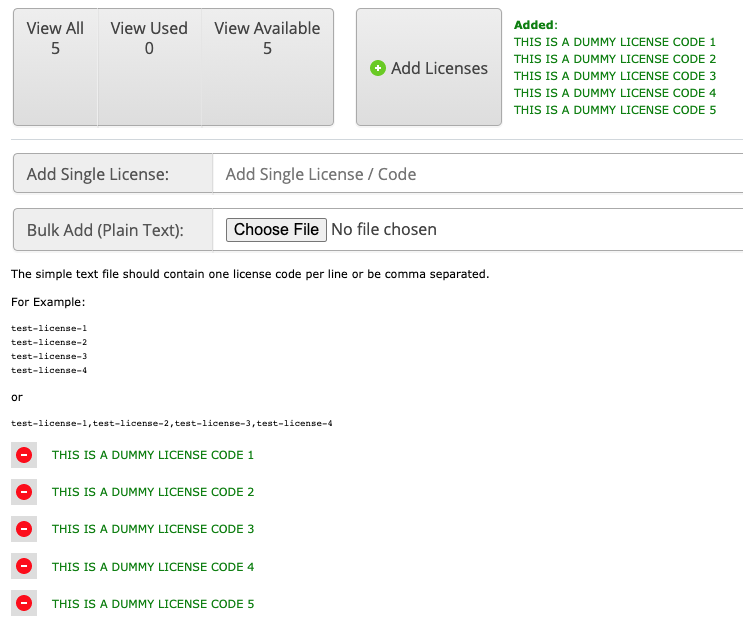
Close the Product License Silo Edit dialog.
Refresh the Config & Contact page to see your updated Product License Silo: 
You’ve done it!
Note the ALLOCATED TO shows this license silo is not yet associated with any products.
We’ll create that connection in the Selling Profiles within the Product Page settings.
Here’s how….
Within your Developer Dashboard look for the PRODUCTS tab group.

In this example, the product we seek is NOT LIVE.
So I’ll click the NOT LIVE sub-tab to display a list of NOT LIVE products.
Find the product you seek and click on its name in the Product (Full Edit) column to display its product edit page.
On the Product Edit Page look for the KVR Audio Marketplace (Sell Via KVR) settings group in the left column.
Within this group you’ll find KVR Marketplace Selling Profiles.
Click ADD NEW to open the Selling Profile edit page.
Because you’re selling with KVR DIRECT, name your selling profile “DIRECT”.
Click ACTIVE to activate your new selling profile.
Then look down the left hand column for LICENSE SILO.

Choose the license silo you created for this product.
Then Click SAVE SELLING PROFILE to close the Selling Profile edit page.
It is not necessary to click UPDATE DATABASE when making changes to Selling Profiles but it’s a good habit and will harm nothing.
That’s it. You’re done. You’ve created a License Silo. Uploaded licenses to it and connected it to your product. Nice work!
Delivery Instructions are provided to customers for each item purchased.
It is possible ONE Delivery Instructions document is applicable to your entire brand.
Or, you might have several Delivery Instructions documents for differing products.
KVR allows you to create as many as you require.
It is possible to create a delivery instructions document on KVR in html.
Or you might prefer to link to a pdf.
Or you might opt to simply direct customers to your installation page.
To set Delivery Instructions up:
Log into your KVR Member account authorized with ADMIN or EDITOR privileges for your Developer Account.
Navigate to your Developer Dashboard by clicking this link: https://www.kvraudio.com/z
The first tab group is labeled Marketplace.
Within the Marketplace tab group look for the tab labeled: Config & Contact.

Click the Config & Contact tab to display the Config & Contact edit page.
To create or setup a Delivery Instructions document Look for the PRODUCT DELIVERY INSTRUCTIONS section in the right column and click the ADD NEW button.

Name your Delivery Instructions document.
Then use the html editor to create your Delivery Instructions.
This may be a complex explanation or it might simply say click this link for Installation Instructions.
When you’re done, click SAVE to save your new Delivery Instructions document.
In a final step you’ll point to this document from each product’s Selling Profiles.
To do that…
Navigate to the first product to which you want to associate this Delivery Instructions document.
Click on the EDIT button to access the Product Edit page.
Within the Product Edit page look for the KVR Audio Marketplace (Sell Via KVR) section.
Within that section look for the KVR Marketplace Selling Profiles area.
If a selling profile exists already click on it to enter the Selling Profile edit page.
If not, click NEW ADD to create a new selling profile.

Within the Selling Profile Edit page look for the section labeled: Delivery Instructions.

Use the drop down menu to select the Delivery Instructions you created.
You’ve done it!
Click Save Selling Profile to save your changes.
Repeat this procedure for all products which use this Delivery Instructions document.
You may create as many Delivery Instructions documents as your brand requires.
Most brands will need only one which can be used on all their products.
Now that you have completed the step to configure your products to be sold via KVR Marketplace DIRECT, it’s time to connect those elements to your product and activate it.
Log into a KVR Member account authorized as an ADMIN or EDITOR for your Developer Account.
Navigate to your Developer Dashboard by clicking this link: https://www.kvraudio.com/z
Within your Developer Dashboard the second tab group is labeled PRODUCTS.
Within the PRODUCTS tab group click the tab labeled LIVE to display all your products.
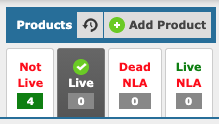
Click the product name for the product you wish to edit.
This opens the Product Edit Page for that product.
Within the Product Edit Page the fourth section is labeled KVR AUDIO MARKETPLACE (SELL VIA KVR)
Within the MARKETPLACE SETTINGS are click the EDIT button within the RED box.
Here click the checkbox for SELL VIA KVR and then SAVE CORE SETTINGS.
This closes the Core Settings Dialog.
The box for the Core Settings should still be RED but it will now inform you that there is no active Selling Profile by which to sell.
Below the Marketplace Setting are you’ll find the KVR Marketplace Selling Profiles area.
To add a Selling Profile click the Green Plus sign.
This opens the ADD NEW SELLING PROFILE dialog.
At minimum you’ll need to complete these fields:
- PROFILE NAME: We recommend calling DIRECT Selling Profiles: DIRECT
- IS PROFILE ACTIVE: Set to ACTIVE.
- PRICE: Set the MSRP for your product.
- COPY PROTECTION: Most products will be ONLINE ACTIVATION (Challenge / Response Code)
- LICENSE DELIVERY: Most products will be INSTANT (Challenge Response / Authorization Code)
- DELIVERY INSTRUCTIONS: Here you’ll point to the Delivery Instructions document you’ve created.
- LICENSE SILO: Here you’ll point to the Product License Silo you’ve created for this product.
When all these elements are complete click SAVE SELLING PROFILE to save your changes AND activate your product.
If you got everything right the MARKETPLACE SETTINGS Core Settings box and the active Selling Profile will turn GREEN.
To see your product active in the KVR Marketplace, click the BIG GREEN MARKETPLACE button in the upper right hand corner of the Product Edit Page.

This reveals fields where you can specify several things specific to each operating system including DOWNLOAD (PRIVATE).

Click the little blue HELP question mark for a detailed explanation of how this works.
When you’re done, click UPDATE DATABASE to save your changes.

PRIVATE FOLDER

Drag your <128MB file to the window labeled DRAG FILES HERE.
Or, click ADD FILES to navigate to your file.
When your file is ready it should appear like this:


The KVR Marketplace has created several departments to streamline the shopping experience for KVR members. The current list of departments includes:
To insure your products appear within these departments please add SUB TAGs as follows:
- MPE
- MP Guitar Effects
- Kontakt Instrument
- MP Engine
- MP HALion
- MP-SampleTank
- MP Guitar VIs
Using MASS EDIT it is possible to add a tag to a group of products in one pass.
To use MASS EDIT for this task:
Log into your KVR account and navigate to your Developer Dashboard.
The second TAB GROUP on your Developer Dashboard is products.
Within that TAB GROUP select LIVE to see all your products in a spreadsheet format.

Select the products you wish to MASS EDIT by checking the box in the second column.
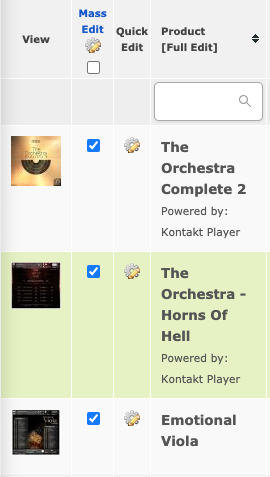
With your products selected click the mysterious gear thingie to enter MASS EDIT mode
![]()
The MASS EDIT window shows you a list of the products you have selected.
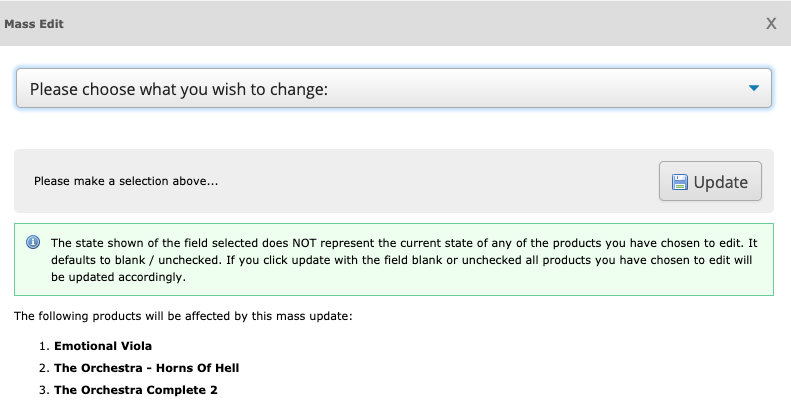
Click the PLEASE CHOOSE WHAT TO CHANGE drop down and select ADD A TAG.

Add the name of the tag required for the Department you want this product to appear within.

Then click UPDATE.
You did it!
All the selected products should now be tagged so that they appear in the specified KVR Marketplace Departments.
To confirm: navigate to the department in question and see for yourself.
To set up a promotion, navigate to www.KVRAudio.com and log into your KVR user account.
Then click the button at the top of the KVR home page labeled ADMIN: ![]()
This takes you to your Developer Dashboard. There look for the MP Products tab within the Marketplace Tab Group: 
The MP Products tab displays a spreadsheet style list of all your Marketplace products.
Select the products you wish to put on sale by checking the check boxes in the second column:
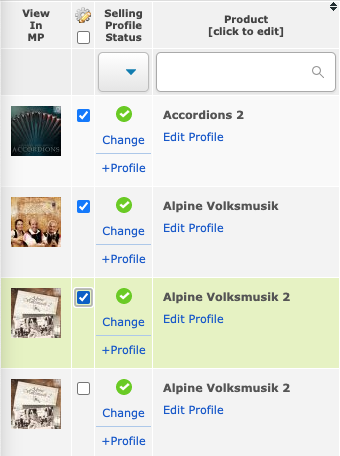
To enter MASS EDIT click the mysterious gear thingie at the top of column 2:![]()
This opens the MASS EDIT window where you are shown a list of the products you have selected.
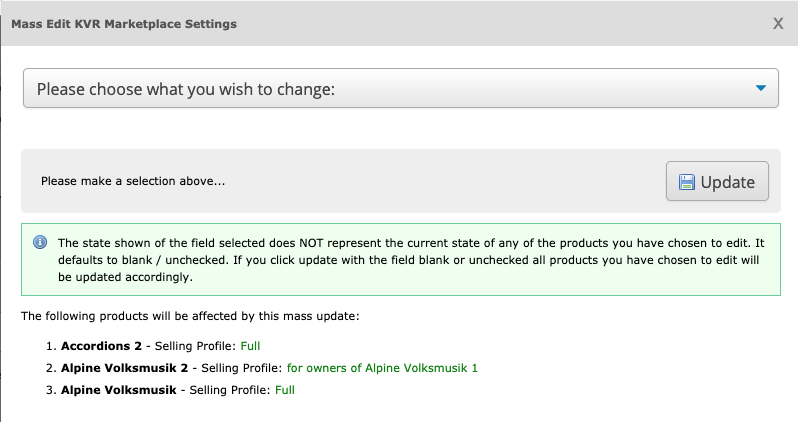
To put the selected group of products on sale use the PLEASE CHOOSE WHAT TO CHANGE drop down to select KVRMP: Offer/Promo: % Discount + Start/End Dates
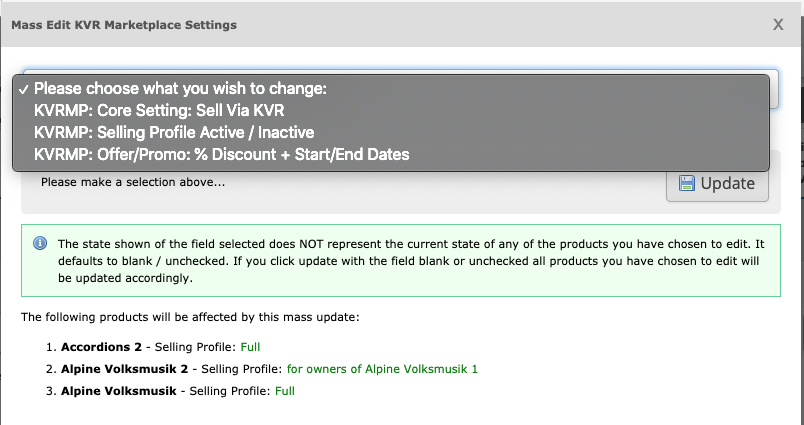
This opens a dialog where you tell KVR the Percentage Discount and the Time Frame of your promotion: 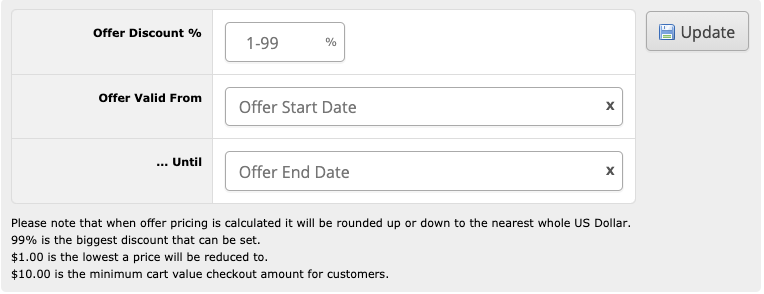
When you’ve input your details, click UPDATE and celebrate your success. You did it! Your promotion is now scheduled.
MULTIPLE DISCOUNTS?
If you wish to offer some of your products at one discount and others at a different discount, you may repeat this procedure however many time you need with separate groups of products.